When grading essays, especially before teaching students to edit, you’ll notice many students making the same mistakes, even with conventions. You know the ones–not capitalizing the word English, misspelling homophones, writing comma splices.
A few times a year, perhaps a tad obsessive, I keep a tally of specific errors while I’m grading so that I’ll have a list of what rules I need to cover. I then circle the ones with the most tally marks and end up with a list that looks something like this: Teach homophones (there, your, too), capitalization (English, the pronoun I, God versus gods), and comma splices (compound and complex sentences), for example.
Along with your state standards, this is the place to begin because these objectives will be listed there. Notice what students are having difficulties with and start teaching.
Teaching Students to Edit with an Editor’s Checklist Anchor Chart
Anchor charts offer students a quick reference when needed, so use them to decorate your classroom walls. Students will use them!
Grab a piece of butcher paper, title it Editor’s Checklist, and tape it to your wall. (I’ve found that small circles of masking tape with a drop of glue on each one work well on concrete.)
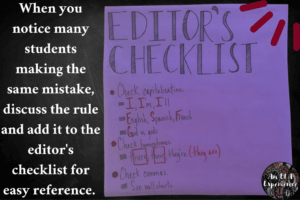
When you notice a common mistake, discuss the rule with students and add it to the chart for easy reference. For example, you may write, “Check capitalization.” Underneath that (or on another chart) write the words and/or rules students find difficult (e.g., Always capitalize languages–English, Spanish, French, German).

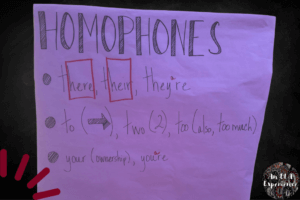
If homophones are a problem, add “Check homophones” to your chart. Again, underneath that (or on another anchor chart), write the homophones students are using incorrectly with a hint on how to tell them apart.
For example, when explaining there, their, and they’re, I point out the word here in there to show that both can refer to location and the word heir in their to remind students that heir and their indicate possession. For they’re, I remind students that it’s a contraction for they are and explain how the apostrophe is usually placed where the letter is omitted.
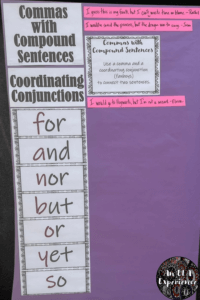
If you’re seeing lots of comma splices, it’s time to start studying comma rules–my favorite. Seriously. 🤩 Write a note on your editors’ checklist to remind students to check comma wall charts for rules, mnemonics, and examples.
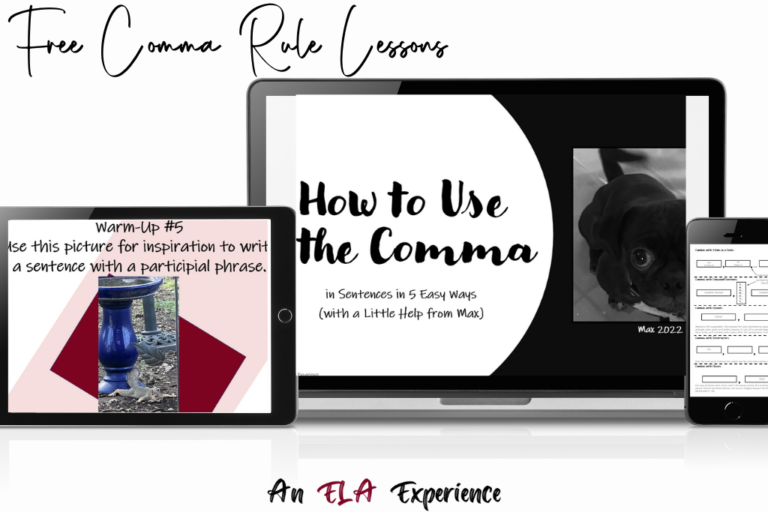
At the beginning of the school year, I see more mistakes with commas than anything else, so these rules definitely need their own wall charts. (Scroll to the bottom of the page to get your free comma rule anchor charts. They just need to be attached to butcher paper and hung. Your students can add their sentences to them.)
Teaching Students to Edit with Daily Practice
It would be great to check various concepts off of the to-teach list after a quick explanation, but teaching isn’t that easy (as you know). Students need practice. You’ve heard the saying, “Use it or lose it,” and it is true.
Daily Warm-Ups
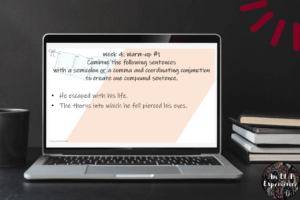
Warm-ups offer a perfect way to provide practice for students with five minutes a day. Plus, they provide a routine for students and give you time to take attendance. (I must add that the only days I received email reminders for forgotten attendance were the days I didn’t schedule warm-ups because of benchmark testing or other events.)
Throughout the years, my warm-ups focused on comma rules for the most part, but when we studied apostrophes, for example, I’d make some that included apostrophes. The same for capitalization, homophones, social-emotional learning, or whatever skill we were addressing. (We even exercised a little when one of my students was researching how it affected learning.)
You can find eighteen weeks of warm-ups in my TPT store, and I’m working on adding more. They require students to write one sentence a day by combining, imitating, and composing. (Also, along with anchor charts, my freebie posted at the bottom of this page has a free sample of warm-ups for commas with compound sentences, complex sentences, appositive phrases, and more.)
Whatever you choose, begin your classes with some kind of warm-up to provide your students with daily practice.
Focused Lessons
Students need to apply what they learn to their writing for the best results, but they also need direct instruction, and this is another way you can provide students with that practice. Add a lesson on homophones or commas or whatever skill you’re working on to your agendas. (This post is focusing on teaching students to edit, but you can read my first blog post, “Easy Introductory Activities for Teaching Students How to Use the Comma,” for lessons on using commas in sentences or visit “Homophones for Practice–Game and Worksheet Bundle” to purchase lessons on homophones.)
Checking Drafts
Whatever concept you are studying, have students check drafts of any writing for that rule. For example, when you’re studying capitalization, ask them to circle the pronoun I or the word English in their writings and make sure they’re capitalized. For homophones, circle and check every to, too, and two. For commas with complex sentences with adverb clauses, for example, ask students to circle the first word of every sentence then highlight those sentences that begin with subordinating conjunctions (like as, after, although, when, while, until, before, because, if, since). Next, for those sentences that begin with subordinating conjunctions, ask them to make sure they have a comma at the pause. If they don’t have a particular word or sentence, then have them add one at the bottom of the draft.
Also, have students read their papers aloud. Whether it’s to themselves or a friend, they’ll often notice errors when they’re reading out loud, and they can correct them then.
Providing Resources
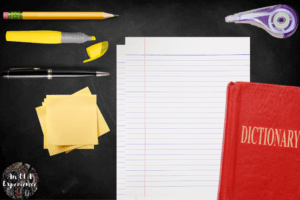
Provide resources for your students: pencils, highlighters, correction tape, dictionaries, thesauri, and sticky notes. Give them the tools writers use. (Of course, they should have their own pens and paper, but it’s good to be prepared for those times when they don’t.)
I’ve also found it helpful to have a list of expert spellers for each class. Students who need assistance with spelling can meet with an expert speller. The expert uses a pencil to circle a few spelling errors on the other student’s draft. The writer then corrects the spelling with the help of a dictionary if needed. (The expert speller should be a polite student who does not belittle the writer or mark every error on their paper.)
Teaching Students to Edit–Self, Peer, Teacher
There are a few ways students can edit: self-editing, peer editing, student-teacher, and teacher, and I use all four. Again, I focus on what we are studying or have studied. (I don’t expect them to punctuate a compound-complex sentence correctly if we haven’t covered it.)
Self-Editing
When students are writing, I tell them to just write. We’ll worry about conventions later. I initially want them to get their ideas on paper, whether it’s a simple prewriting activity or a draft of a larger piece of writing. However, as soon as they have a piece of writing, students can edit their own drafts for the skills we’re working on.
For spelling, when students are rereading what they’ve written, I ask them to circle any words they think may be misspelled. They can then check for accuracy with a dictionary, print or digital. If they ask me to spell a word for them, I help them by pronouncing the word slowly. Of course, when they are typing their essays, they use the spelling and grammar checker.
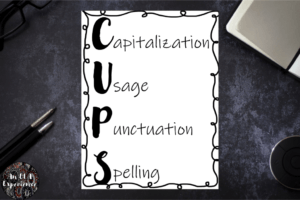
CUPS is a mnemonic I’ve used to remind students to check capitalization, usage, punctuation, and spelling. Begin by focusing on one letter for a rule you’re covering. Later, walk them through this editing list, using your draft as a model for demonstration.
Peer Editing
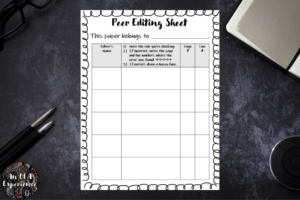
An activity called clocking from Acts of Teaching is great for whole-group peer editing. To prepare for this, students number the lines of their drafts and staple a clocking sheet with their name on it to the top.
They then sit in two circles, one inside the other, facing each other. On the teacher’s command, each student passes their paper to the student across from them, and that student checks for a rule specified by the teacher (one they’ve studied) and notes whether the student needs to correct anything for that rule. They write this information on the clocking sheet, noting the page and line numbers (not writing on the drafts). If they don’t find any mistakes, they can write a checkmark or draw a happy face. Papers are returned, and the outer circle then moves one seat to the right, and the process is repeated. (This activity works when students are seated in small groups too.) Students then return to their papers and make corrections as needed.
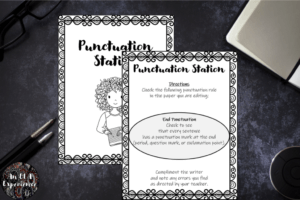
For small-group peer editing, try stations.
- Plan enough stations to accommodate three to four students each.
- Staple cover sheets to the outside of manila folders (e.g., capitalization station, punctuation station, etc.) and a rule you want students to check to the inside.
- Display one folder in each station in separate areas of your classroom.
- Have students rotate through the stations, exchanging papers and editing for skills you’ve covered in class.
Teacher-Student Editing
When conferencing one-on-one with students, take this opportunity to discuss an error you’re seeing in their writing. Just one. You don’t want to destroy their self-confidence. Also, use this time to praise them on at least one thing they’re doing well, preferably more.
Teacher Editing
After students hand their papers in, I do not mark every mistake I see on their essays. Instead, I write a grow (something they can improve on) and at least one glow (something they did well) on each paper, and I allow them to make corrections if they want to raise the grade on that paper. (This sounds like a lot of extra work, but only a few students will take you up on this offer.)
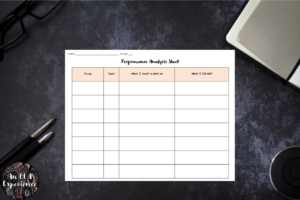
I also have them keep a performance analysis sheet where they record the holistic score (1-4 from state rubric) for that paper, what they need to work on, and what they’re doing well. Since we do this for every major paper, they can see their growth throughout the school year.
Related Links
Easy Introductory Activities for Teaching Students How to Use the Comma (Blog #1)
Peer Editing Activities (from my TPT store)
Teaching Students to Edit Their Own Writing (elementary level)
How to Teach Students Peer Editing
How to Publish Student Writing in the Classroom and Beyond (Blog #10)
When teaching students to edit, here’s what you do (in a nutshell):
- Note common errors students are making.
- Add these to your anchor charts.
- Teach the rules with lessons.
- Practice daily with warm-ups.
- Practice often with editing drafts.
Thank you for reading, and remember I’m here to help, so let me know if you have any questions about teaching students to edit.